

Installation Windows 11 In practice, it starts with a single element – a properly prepared installation flash drive. It's at this stage that questions most often arise: which program to choose, whether the hardware requirements can be bypassed, and which method is the fastest and least problematic.
In this guide we show 3 simple and proven ways to create a bootable pendrive with Windows 11. Specific methods, differences between them and a clear answer when it is worth choosing which one (links to sources below the article).
What to prepare before takeoff
Before you start creating an installation flash drive with Windows 11, it's worth spending a minute preparing the basics. This will help you avoid errors, interrupted installations, and unnecessary repeating the entire process.
Most important elements:
• Flash drive at least 8 GB – 16 GB recommended, especially with newer installer versions. The media will be completely wiped.
• Stable internet connection – downloading a Windows 11 ISO image is several gigabytes of data.
• Windows 11 ISO image or Microsoft installer tool – depending on the chosen method.
• A computer with Windows 10 or Windows 11 – all described tools work correctly on these systems.
It's worth checking in advance:
• Whether the target computer boots in UEFI (most common case in new PCs).
• Do you have access to boot menu or BIOS/UEFI settings (keys like F12, F11, Esc, Del).
Good preparation at this stage significantly shortens the entire process – the flash drive itself can be made in just a few minutes if you have everything at hand.
Method 1: Rufus – the most common option (with the option to bypass the requirements)
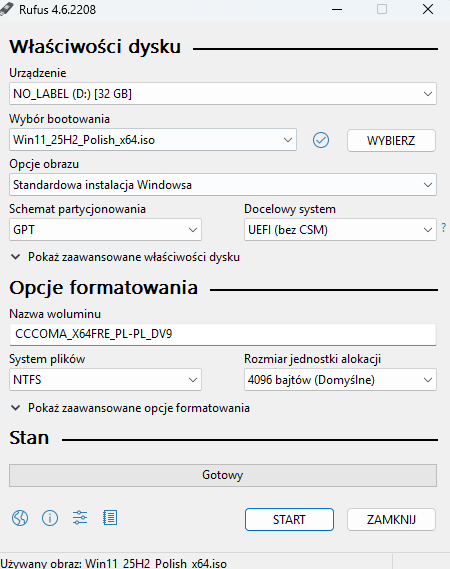
Rufus is the most frequently chosen tool for creating bootable Windows 11 flash drives – mainly because it is fast, lightweight and gives you a lot of control over the entire process. It also the only one of the methods described, which allows you to easily bypass selected Windows 11 hardware requirements.
How to prepare a flash drive in Rufus
Download Rufus (portable version is enough) and run it as administrator.
Select the flash drive in the field Device.
Select file Windows 11 ISO.
Set the partitioning scheme (most often GPT) and target system (UEFI).
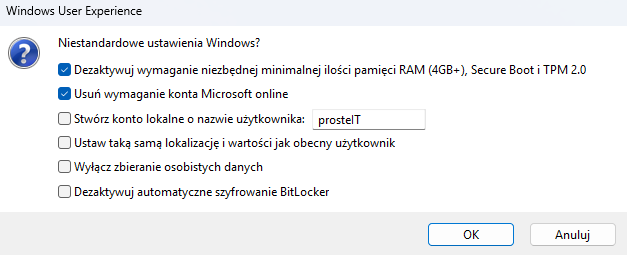
After clicking Start Rufus will ask about additional Windows 11 options.
Bypassing requirements – what does it really mean?
Rufus enables, among other things:
• omission of a requirement TPM 2.0,
• omission Secure Boot,
• installation without the need to log in to a Microsoft account (offline).
This is especially useful when:
• older computers,
• test machines,
• laboratory or emergency installations.
What you should know before choosing this method
Rufus doesn't "break" the system – it just prepares the installer in a less restrictive way. Windows 11 itself works normally afterward, but Microsoft does not guarantee full support on hardware that doesn't meet official requirements. In practice, this mainly means a lack of formal guarantees, not problems in everyday use.
In short:
If you care about speed, flexibility and the ability to install Windows 11 even on older hardware, Rufus is the most sensible choice.
Method 2: Official Windows 11 installation media from Microsoft – safest (without bypassing requirements)
Official installation media from Microsoft This is the simplest and most "safe" method of preparing a Windows 11 flash drive. The entire process is guided step by step by the manufacturer's tool, without additional settings and the risk of incorrect configuration.
How to create an installation flash drive
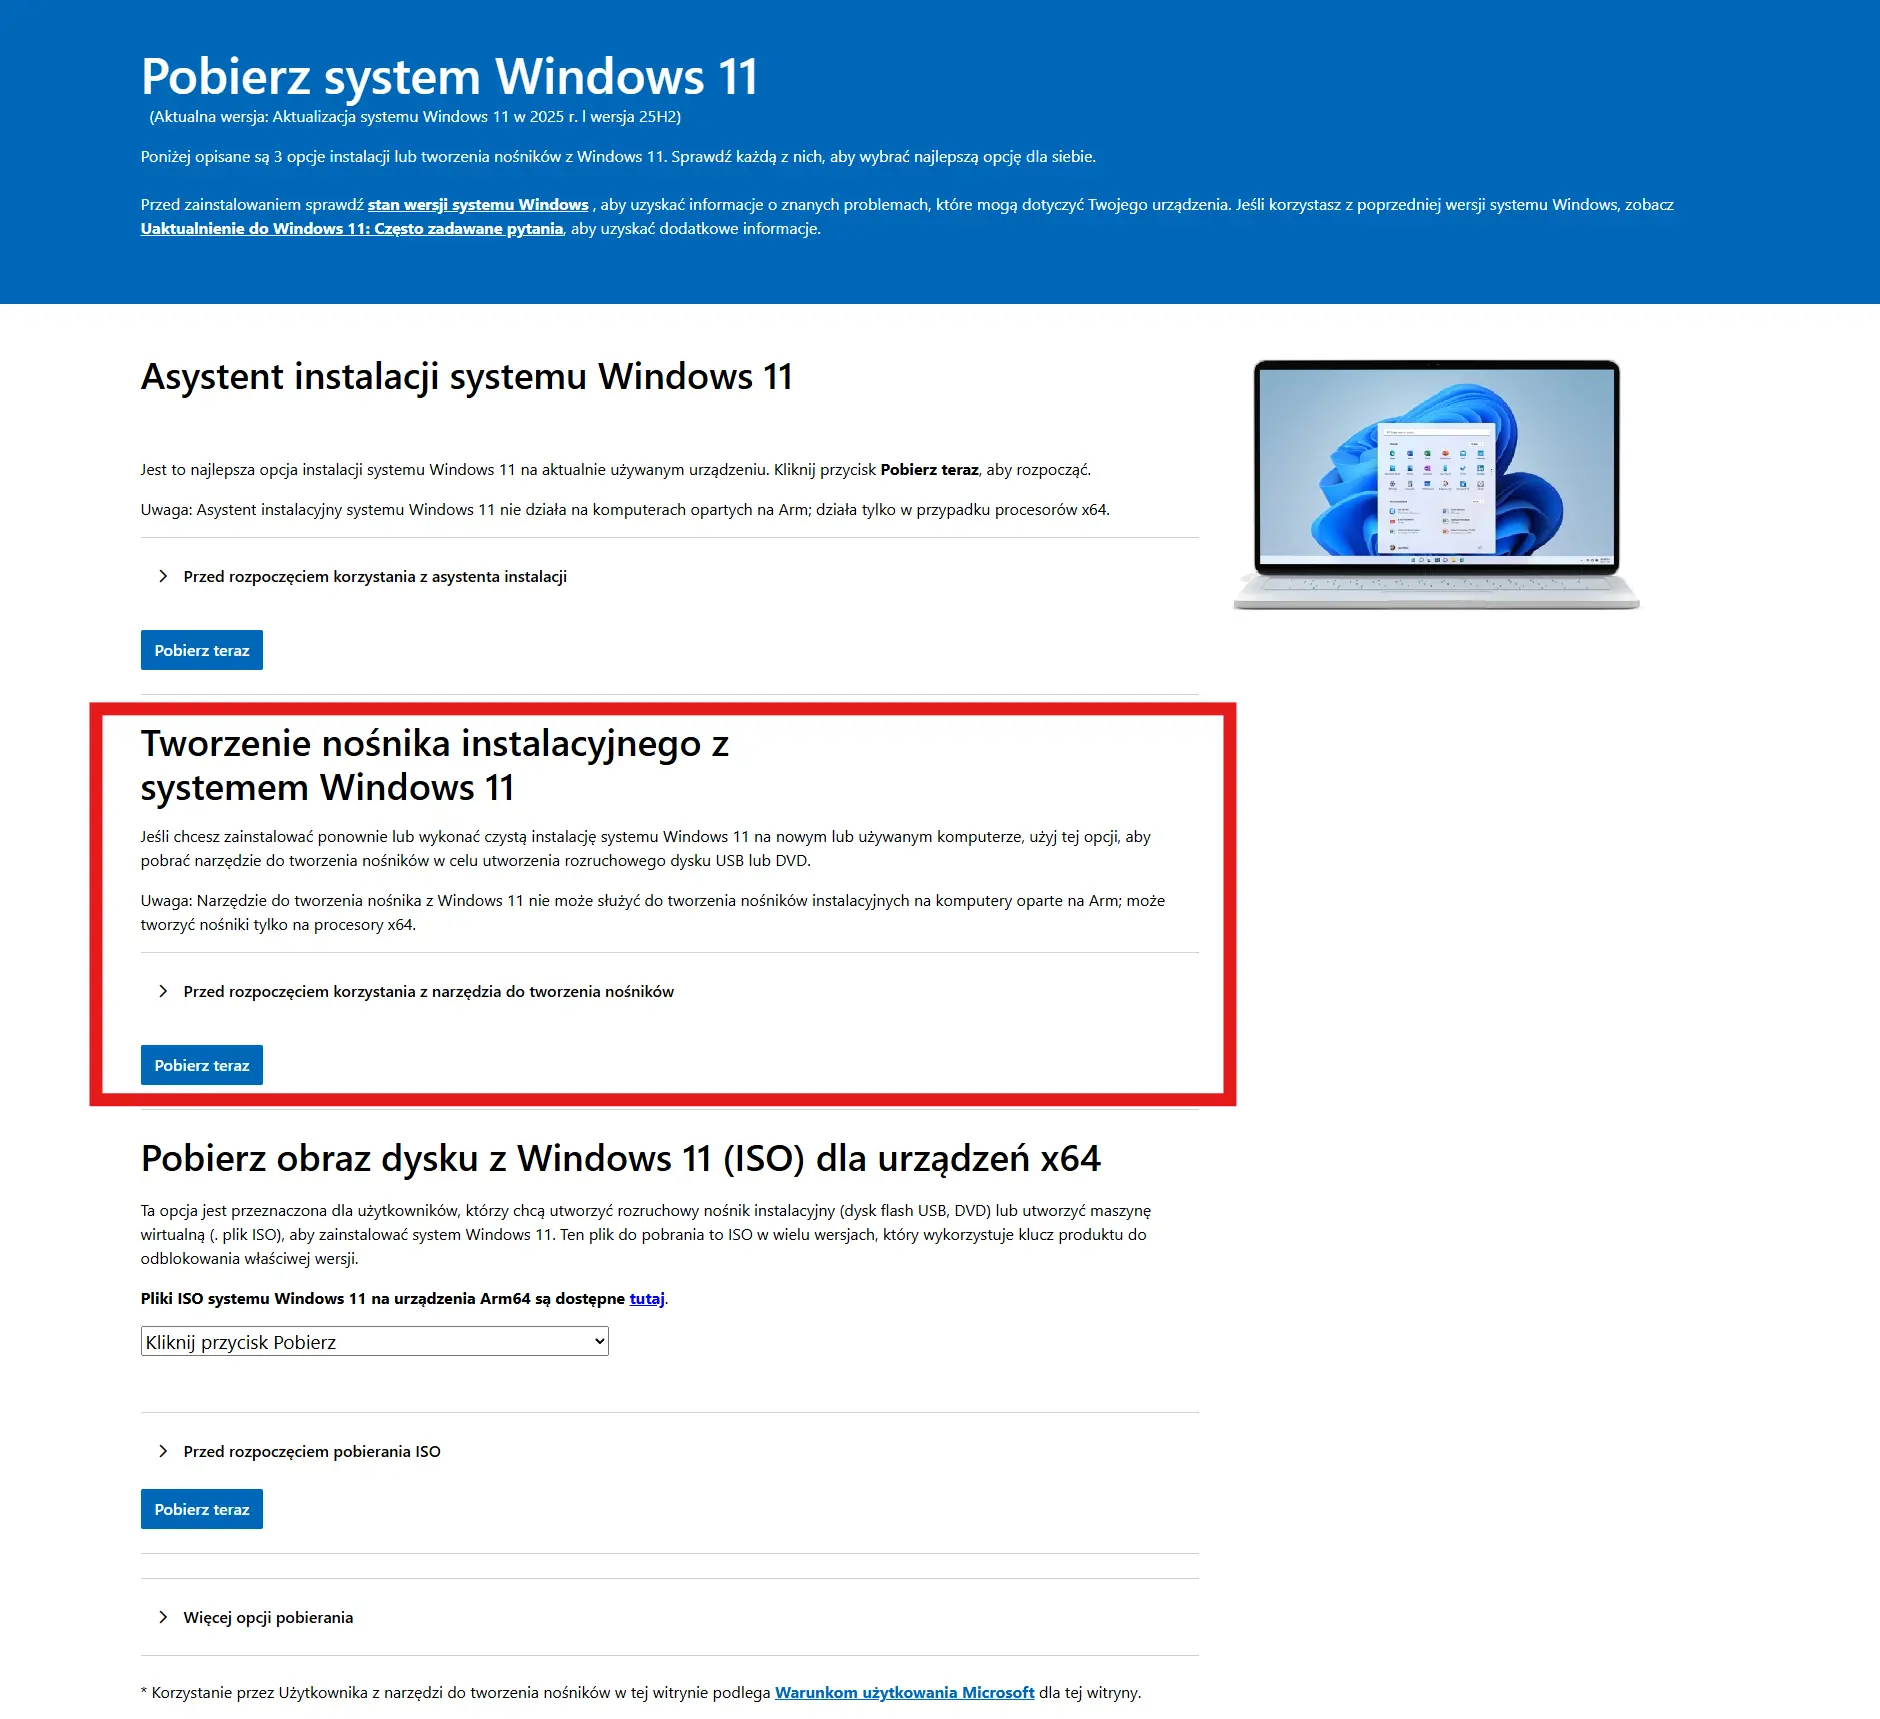
Go to official website Windows 11 download and download the media creation tool.
Run the program and accept the license terms.
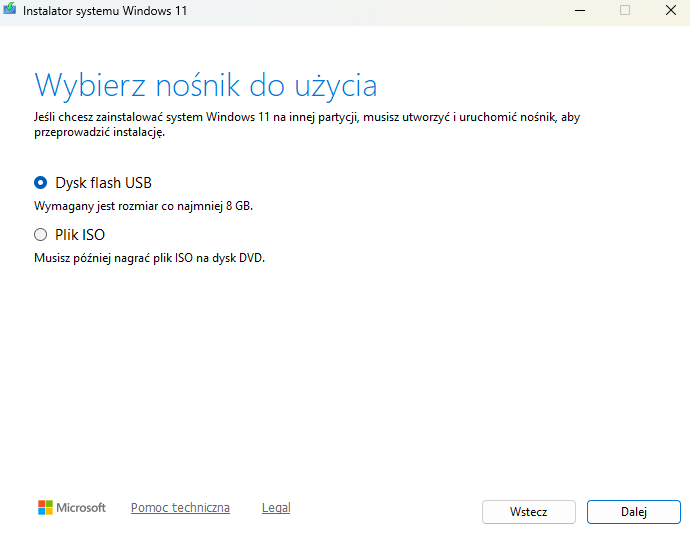
Select an option Create installation media (USB).
Connect the pendrive and select it as the target medium.
The tool will download system files and automatically prepare a bootable USB.
Once completed, the flash drive is ready for use – no additional configuration is required.
What you need to know
This method does not allow you to bypass Windows 11 hardware requirements. The installer will check for TPM 2.0, Secure Boot, and processor compatibility, among other things. If your computer doesn't meet these requirements, the installation will be blocked at startup.
This solution works best when:
• you install Windows 11 on a new or company computer,
• you care about full compliance with the manufacturer's guidelines,
• you want to avoid any „workarounds” and non-standard settings.
In short:
If your hardware meets the requirements of Windows 11 and you want the installer prepared exactly as the manufacturer intended, official Microsoft media is the safest choice.
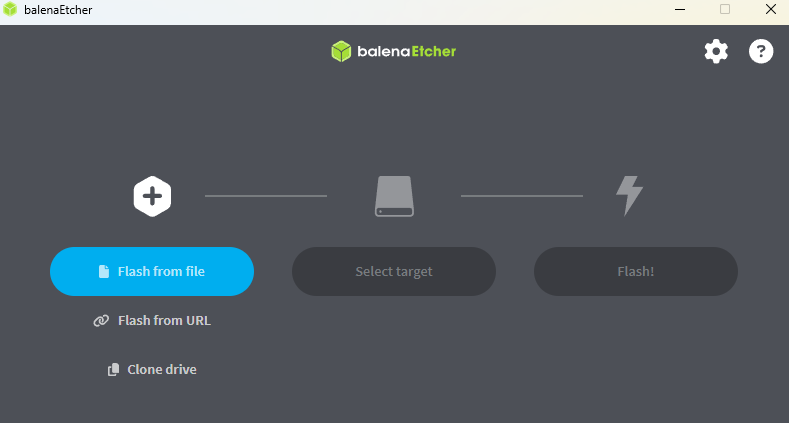
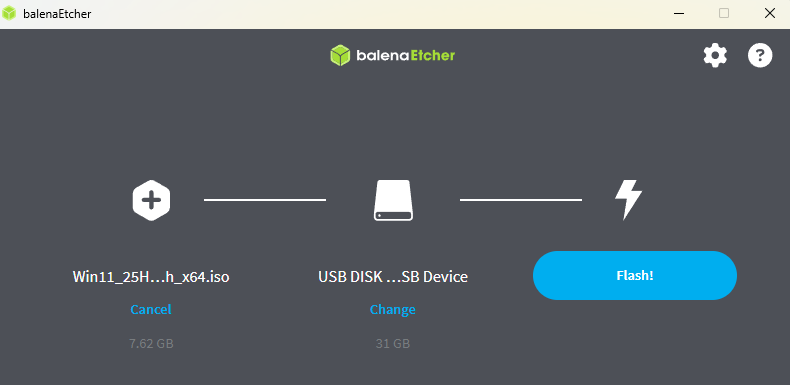
Method 3: balenaEtcher – simple "upload ISO to UBS"„
balenaEtcher From Balena This tool is designed with maximum simplicity in mind. It doesn't analyze system settings in detail or guide the user through technical options – its purpose is one: copy the ISO image to a pendrive in a correct and bootable way.
How to prepare a pendrive in balenaEtcher
Download and install balenaEtcher.
Select file Windows 11 ISO.
Select the pendrive as the target medium.
Click Flash and wait for the process to complete.
The program takes care of the rest – after a few minutes the flash drive is ready for use.
What you should know before choosing this method
balenaEtcher does not offer additional configuration options familiar from Rufus. You don't have to choose a partition scheme, UEFI/Legacy mode, or bypass Windows 11 requirements. This tool works on a "it either works or it doesn't work" principle.
In practice, this means:
• very low entry threshold,
• minimal risk of user errors,
• no control over the installer's hardware requirements.
In short:
If you just want to burn a Windows 11 ISO to a flash drive without delving into technical details, balenaEtcher will be the simplest and least problematic choice.
Which method to choose and what to do next
The choice of method depends mainly on, what equipment do you have and how much do you want to interfere with the installation process:
• Rufus – the best choice when speed, full control and the ability to install Windows 11 on older hardware are important.
• Official Microsoft media – the safest option if your computer meets all the requirements and you want to install the system without any workarounds.
• balenaEtcher – a good choice when you care about simplicity and just want to „burn ISO to USB” without any technical decisions.
Before you proceed with the installation, it is also worth:
• check in BIOS/UEFI whether the computer starts in UEFI mode,
• prepare a key for the boot menu (e.g. F12, F11, Esc),
• test the flash drive calmly, before you need it immediately,
• make sure there is no important data on the USB.
That's all it takes – a well-prepared flash drive is half the success when installing Windows 11.
FAQ - questions and answers
All you need is a flash drive with a capacity of at least 8 GB, but in practice it's better to use 16 GB. The medium should be functional and relatively fast - very old flash drives can cause errors during installation.
Yes. Any of the methods described deletes all data from the flash drive. If you have important files on it, back them up before you begin.
Common causes include an incompatible boot mode (UEFI vs. Legacy), improperly prepared media, or USB booting disabled in the BIOS/UEFI. It's also worth checking whether the flash drive was created correctly and safely ejected.
For most new computers the best choice is GPT + UEFI. MBR and Legacy BIOS mode mainly make sense on older hardware.
The system usually works fine, but Microsoft does not guarantee full support on hardware that doesn't meet official requirements. This solution works mainly for testing or on older computers.
Yes. You can use the same installation flash drive multiple times – on one or multiple computers, as long as the drive remains functional.
After selecting the appropriate method and properly preparing the flash drive, you can proceed immediately Windows 11 installation.
Sources:
2. https://www.microsoft.com/pl-pl/software-download/windows11